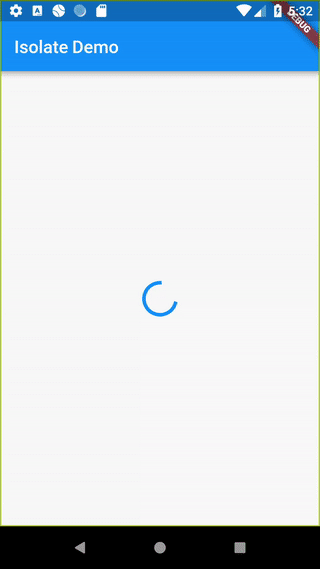
在后台处理 JSON 数据解析
如何在后台执行任务。
Dart 应用通常只会在单线程中处理它们的工作。并且在大多数情况中,这种模式不但简化了代码而且速度也够快,基本不会出现像动画卡顿以及性能不足这种「不靠谱」的问题。
但是,当你需要进行一个非常复杂的计算时,例如解析一个巨大的 JSON 文档。如果这项工作耗时超过了 16 毫秒,那么你的用户就会感受到掉帧。
为了避免掉帧,像上面那样消耗性能的计算就应该放在后台处理。你可以使用一个单独的 Isolate。你可以根据以下步骤来操作:
使用步骤
#添加
http这个 package;-
使用
httppackage 发起一个网络请求; 将响应转换成一列照片;
将这个工作移交给一个单独的 isolate。
1. 添加 http 包
#
首先,在你的项目中添加 http 这个 package,
http package 会让网络请求变的像从 JSON 端点获取数据一样简单。
要将 http package 添加为依赖项,请运行 flutter pub add:
flutter pub add http
2. 发起一个网络请求
#
在这个例子中,你将会使用 http.get()
方法通过
JSONPlaceholder REST API 获取到一个包含
5000 张图片对象的超大 JSON 文档。
Future<http.Response> fetchPhotos(http.Client client) async {
  return client.get(Uri.parse('https://jsonplaceholder.typicode.com/photos'));
}
3. 解析并将 json 转换成一列图片
#
接下来,根据 获取网络数据 的说明,为了让接下来的数据处理更简单,你需要将 http.Response 转换成一列 Dart 对象。
创建一个 Photo 类
#
首先,创建一个包含图片数据的 Photo 类。还需要一个 fromJson 的工厂方法,使得通过 json 创建 Photo 变的更加方便。
class Photo {
final int albumId;
final int id;
final String title;
final String url;
final String thumbnailUrl;
const Photo({
required this.albumId,
required this.id,
required this.title,
required this.url,
required this.thumbnailUrl,
});
factory Photo.fromJson(Map<String, dynamic> json) {
return Photo(
albumId: json['albumId'] as int,
id: json['id'] as int,
title: json['title'] as String,
url: json['url'] as String,
thumbnailUrl: json['thumbnailUrl'] as String,
);
}
}
将响应转换成一列图片
#
现在,为了让 fetchPhotos() 方法可以返回一个
Future<List<Photo>>,我们需要以下两点更新:
-
创建一个可以将响应体转换成
List<Photo>的方法:parsePhotos() -
在
fetchPhotos()方法中使用parsePhotos()方法
// A function that converts a response body into a List<Photo>.
List<Photo> parsePhotos(String responseBody) {
final parsed = (jsonDecode(responseBody) as List<Object?>)
.cast<Map<String, Object?>>();
return parsed.map<Photo>(Photo.fromJson).toList();
}
Future<List<Photo>> fetchPhotos(http.Client client) async {
final response = await client.get(
Uri.parse('https://jsonplaceholder.typicode.com/photos'),
);
// Synchronously run parsePhotos in the main isolate.
return parsePhotos(response.body);
}
4. 将这部分工作移交到单独的 isolate 中
#
如果你在一台很慢的手机上运行 fetchPhotos() 函数,你或许会注意到应用会有点卡顿,因为它需要解析并转换 json。显然这并不好,所以你要避免它。
那么我们究竟可以做什么呢?那就是通过 Flutter 提供的 compute()
方法将解析和转换的工作移交到一个后台 isolate 中。这个 compute() 函数可以在后台 isolate 中运行复杂的函数并返回结果。在这里,我们就需要将 parsePhotos() 方法放入后台。
Future<List<Photo>> fetchPhotos(http.Client client) async {
final response = await client.get(
Uri.parse('https://jsonplaceholder.typicode.com/photos'),
);
// Use the compute function to run parsePhotos in a separate isolate.
return compute(parsePhotos, response.body);
}
使用 Isolates 需要注意的地方
#
Isolates 通过来回传递消息来交流。这些消息可以是任何值,它们可以是 null、num、bool、double 或者
String,哪怕是像这个例子中的 List<Photo> 这样简单对象都没问题。
当你试图传递更复杂的对象时,你可能会遇到错误,例如在 isolates 之间的 Future 或者 http.Response。
与此同时,后台进程的其他解决方案是使用
worker_manager
或 workmanager package。
完整样例
#import 'dart:async';
import 'dart:convert';
import 'package:flutter/foundation.dart';
import 'package:flutter/material.dart';
import 'package:http/http.dart' as http;
Future<List<Photo>> fetchPhotos(http.Client client) async {
final response = await client.get(
Uri.parse('https://jsonplaceholder.typicode.com/photos'),
);
// Use the compute function to run parsePhotos in a separate isolate.
return compute(parsePhotos, response.body);
}
// A function that converts a response body into a List<Photo>.
List<Photo> parsePhotos(String responseBody) {
final parsed = (jsonDecode(responseBody) as List<Object?>)
.cast<Map<String, Object?>>();
return parsed.map<Photo>(Photo.fromJson).toList();
}
class Photo {
final int albumId;
final int id;
final String title;
final String url;
final String thumbnailUrl;
const Photo({
required this.albumId,
required this.id,
required this.title,
required this.url,
required this.thumbnailUrl,
});
factory Photo.fromJson(Map<String, dynamic> json) {
return Photo(
albumId: json['albumId'] as int,
id: json['id'] as int,
title: json['title'] as String,
url: json['url'] as String,
thumbnailUrl: json['thumbnailUrl'] as String,
);
}
}
void main() => runApp(const MyApp());
class MyApp extends StatelessWidget {
const MyApp({super.key});
@override
Widget build(BuildContext context) {
const appTitle = 'Isolate Demo';
return const MaterialApp(
title: appTitle,
home: MyHomePage(title: appTitle),
);
}
}
class MyHomePage extends StatefulWidget {
const MyHomePage({super.key, required this.title});
final String title;
@override
State<MyHomePage> createState() => _MyHomePageState();
}
class _MyHomePageState extends State<MyHomePage> {
late Future<List<Photo>> futurePhotos;
@override
void initState() {
super.initState();
futurePhotos = fetchPhotos(http.Client());
}
@override
Widget build(BuildContext context) {
return Scaffold(
appBar: AppBar(title: Text(widget.title)),
body: FutureBuilder<List<Photo>>(
future: futurePhotos,
builder: (context, snapshot) {
if (snapshot.hasError) {
return const Center(child: Text('An error has occurred!'));
} else if (snapshot.hasData) {
return PhotosList(photos: snapshot.data!);
} else {
return const Center(child: CircularProgressIndicator());
}
},
),
);
}
}
class PhotosList extends StatelessWidget {
const PhotosList({super.key, required this.photos});
final List<Photo> photos;
@override
Widget build(BuildContext context) {
return GridView.builder(
gridDelegate: const SliverGridDelegateWithFixedCrossAxisCount(
crossAxisCount: 2,
),
itemCount: photos.length,
itemBuilder: (context, index) {
return Image.network(photos[index].thumbnailUrl);
},
);
}
}

除非另有说明,本文档之所提及适用于 Flutter 3.38.1 版本。本页面最后更新时间:2025-8-19。查看文档源码 或者 为本页面内容提出建议。