开发体验初探
你将了解到什么
#-
如何基于示例模板创建新的 Flutter 应用。
-
如何运行新的 Flutter 应用。
-
如何在应用中使用「热重载」应用你的更改。
这些工作的细节会根据你使用 IDE 的不同,有所变化。
-
选项 1 讲解如何使用 Visual Studio Code 及其 Flutter 扩展进行编码。
-
选项 2 讲解如何使用 Android Studio 或 IntelliJ IDEA 及其 Flutter 插件进行编码。
Flutter 支持 IntelliJ IDEA Community、Educational 和 Ultimate editions。
-
选项 3 讲解如何使用自己选择的编辑器编写代码,以及如何使用终端编译和调试代码。
选择你的 IDE
#为 Flutter 应用选择你喜欢的 IDE。
Create a sample Flutter app
#-
To use Flutter DevTools from VS Code, install the Flutter extension. This also automatically installs the Dart extension. With these extensions, you can debug your Flutter app.
-
Open the Command Palette.
Go to View > Command Palette or press + Shift + P.
-
Type
flutter. -
Select Flutter: New Project.
-
When prompted for Which Flutter Project, select Application.
-
Create or select the parent directory for the new project folder.
-
When prompted for a Project Name, enter
test_drive. -
Press Enter.
-
Wait for project creation to complete.
-
Open the
libdirectory, then themain.dart.To learn what each code block does, check out the comments in that Dart file.
The previous commands create a Flutter project directory called test_drive that
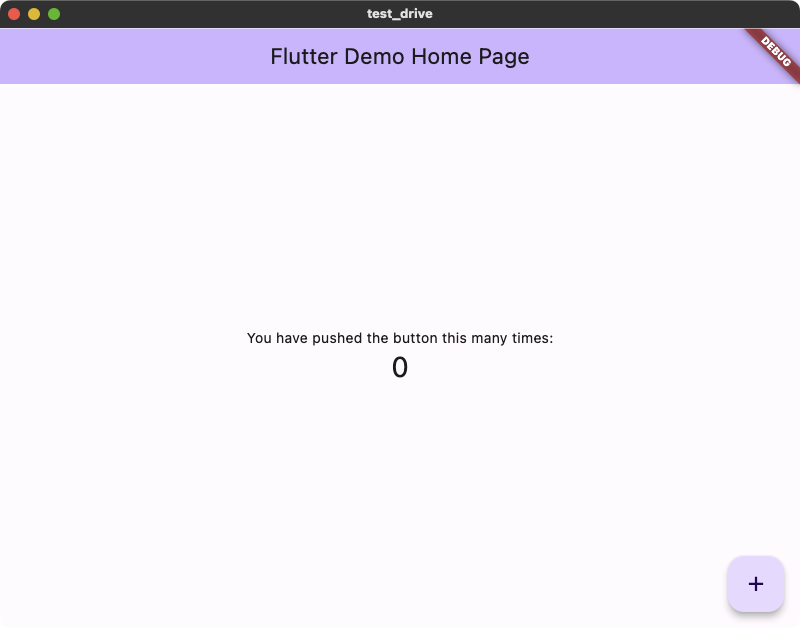
contains a simple demo app that uses Material Components.
Run your sample Flutter app
#Run your example application on your desktop platform, in the Chrome web browser, in an iOS simulator, or Android emulator.
-
Open the Command Palette.
Go to View > Command Palette or press + Shift + P.
-
Type
flutter. -
Select Flutter: Select Device.
If no devices are running, this command prompts you to enable a device.
-
Select a target device from Select Device prompt.
-
After you select a target, start the app. Go to Run > Start Debugging or press F5.
-
Wait for the app to launch.
You can watch the launch progress in the Debug Console view.
After the app build completes, your device displays your app.

Try hot reload
#Flutter offers a fast development cycle with Stateful Hot Reload, the ability to reload the code of a live running app without restarting or losing app state.
You can change your app source code, run the hot reload command in VS Code, and see the change in your target device.
-
Open
lib/main.dart. -
Change the word
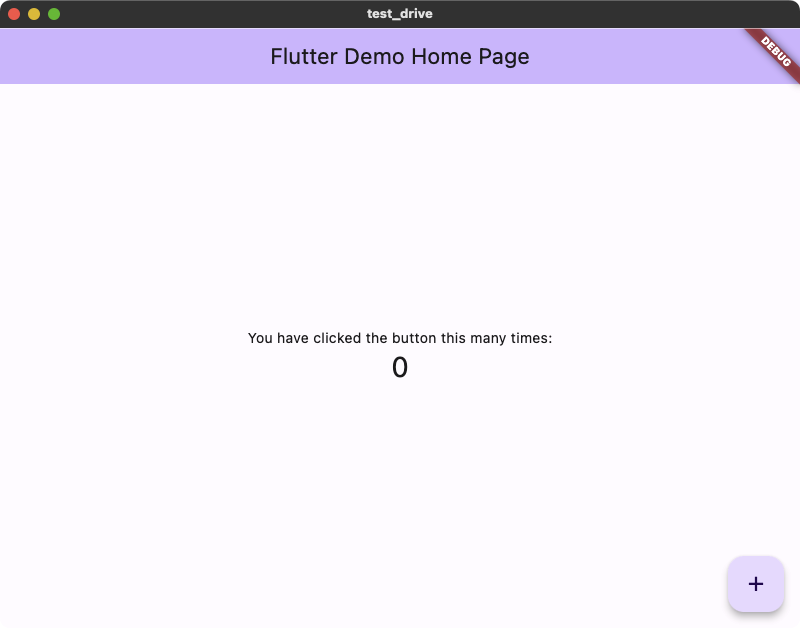
pushedtoclickedin the following string. It is on line 109 of themain.dartfile as of this writing.Original New 'You have pushed the button this many times:' ,'You have clicked the button this many times:' , -
Save your changes: invoke Save All, or click Hot Reload
.
Your app updates the string as you watch.

Create a sample Flutter app
#-
Launch the IDE.
-
To be able to create flutter projects on Android Studio, install the Flutter Plugin and for smart Dart coding assistance that includes code completion, formatting, navigation, intentions, refactorings, and more, install the Dart Plugin.
-
Head back to your IDE start page and Click New Flutter Project at the top of the Welcome to Android Studio dialog.
-
Under Generators, click Flutter.
-
Verify the Flutter SDK path value against the Flutter SDK location on your development machine.
-
Click Next.
-
Enter
test_driveinto the Project name field. Your project name should be written in snake case and in lowercase. This follows the Flutter best practices for naming projects. -
Set the directory in the Project location field to
C:\dev\test_driveon Microsoft Windows or~/development/test_driveon other platforms.If you didn't create that directory before, Android Studio displays a warning that the Directory Does Not Exist. Click Create.
-
From Project type dropdown, select Application.
-
Ignore the remaining form fields. You don't need to change them for this test drive. Click Create.
-
Wait for Android Studio to create the project.
-
Open the
libdirectory, then themain.dart.To learn what each code block does, check out the comments in that Dart file.
The previous commands create a Flutter project directory
called test_drive that contains a simple demo app that
uses Material Components.
Run your sample Flutter app
#-
Locate the main Android Studio toolbar at the top of the Android Studio edit window.

-
In the target selector, select an Android device for running the app. You created your Android target device in the Install section.
-
To run your app, make one of the following choices:
-
Click the run icon in the toolbar.
-
Go to Run > Run.
-
Press Ctrl + R.
-
After the app build completes, your device displays your app.

Try hot reload
#Flutter offers a fast development cycle with Stateful Hot Reload, the ability to reload the code of a live running app without restarting or losing app state.
You can change your app source code, run the hot reload command in Android Studio, and see the change in your target device.
-
Open
lib/main.dart. -
Change the word
pushedtoclickedin the following string. It is on line 109 of themain.dartfile as of this writing.Original New 'You have pushed the button this many times:' ,'You have clicked the button this many times:' , -
Save your changes: invoke Save All, or click Hot Reload
.
Your app updates the string as you watch.

Create a sample Flutter app
#To create a new Flutter app, run the following commands in your shell or Terminal.
-
Run the
flutter createcommand.flutter create test_driveThe command creates a Flutter project directory called
test_drivethat contains a simple demo app that uses Material Components. -
Change to the Flutter project directory.
cd test_drive
Run your sample Flutter app
#-
To verify that you have a running target device, run the following command.
flutter devicesYou created your target device in the Install section.
-
To run your app, run the following command.
flutter run
After the app build completes, your device displays your app.

Try hot reload
#Flutter offers a fast development cycle with Stateful Hot Reload, the ability to reload the code of a live running app without restarting or losing app state.
You can change your app source code, run the hot reload command in VS Code, and see the change in your target device.
-
Open
lib/main.dart. -
Change the word
pushedtoclickedin the following string. It is on line 109 of themain.dartfile as of this writing.Original New 'You have pushed the button this many times:' ,'You have clicked the button this many times:' , -
Save your changes.
-
Type r in the terminal window.
Your app updates the string as you watch.

除非另有说明,本文档之所提及适用于 Flutter 的最新稳定版本,本页面最后更新时间: 2024-12-24。 查看文档源码 或者 为本页面内容提出建议。